


Microsoft Azure Onboarding Integration
Keeps your Azure public IP addresses, and hostnames from DNS zones, updated as assets in edgescan.
How to connect Azure to edgescan
1. Create an application for edgescan in Azure
- Login to the Azure management portal. Search for App registrations using the search functionality and click to get to the App

- Click on the New registration button.
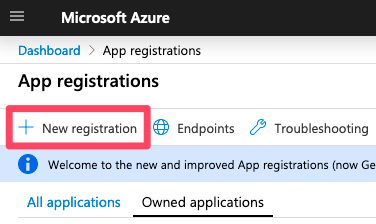
- Enter a name (we recommend ‘edgescan’ or something similar) then click Register.

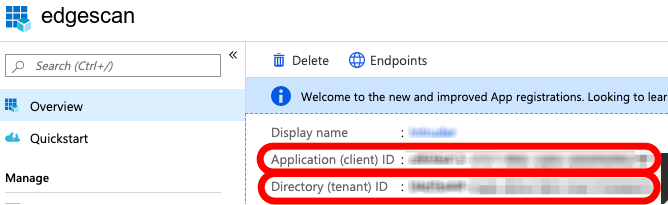
2. Get the Application ID, Application secret key, Directory ID and Subscription ID from Azure
- We require four access keys to connect your Azure account to edgescan:
- ‘Application (client) ID’ of the Azure application you just created.
- ‘Directory (tenant) ID’ from Azure Active Directory.
- Application secret key’ of the Azure application you just created.
- ‘Subscription ID’ of your Azure subscription.
- You need to get them from various sections of the Azure portal, so it’s probably best to open a text document that you can copy them into. It should all be straight-forward if you follow the steps below, so hang in there!
Application (client) ID
- Click on the ‘edgescan’ application that we just created
- Click Overview and take a note of the Application (client) ID.
Directory (tenant) ID
- You can also get the Directory (tenant) ID from this screen so let’s note that one down too.
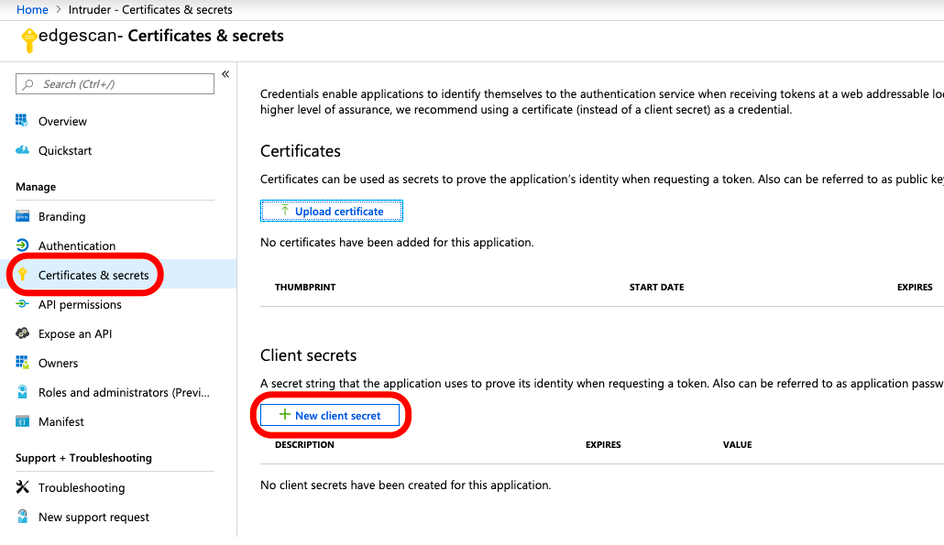
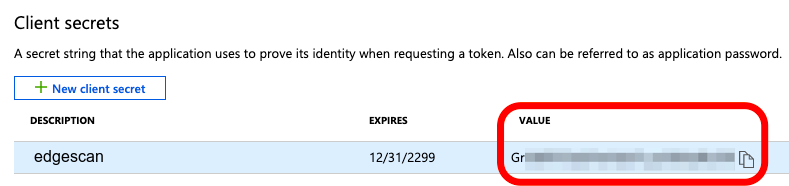
Application secret key (in Azure you’re looking for the secret ‘VALUE’
- Now scroll down and click on Certificates & secrets in the left navigation panel.
- Click on New client secret:
- Enter a description (e.g. ‘edgescan’)
- Set an expiry date (i.e. how long you want the secret to be valid for).
(Please note that edgescan will no longer be able to access your Azure account when the secret expires.)
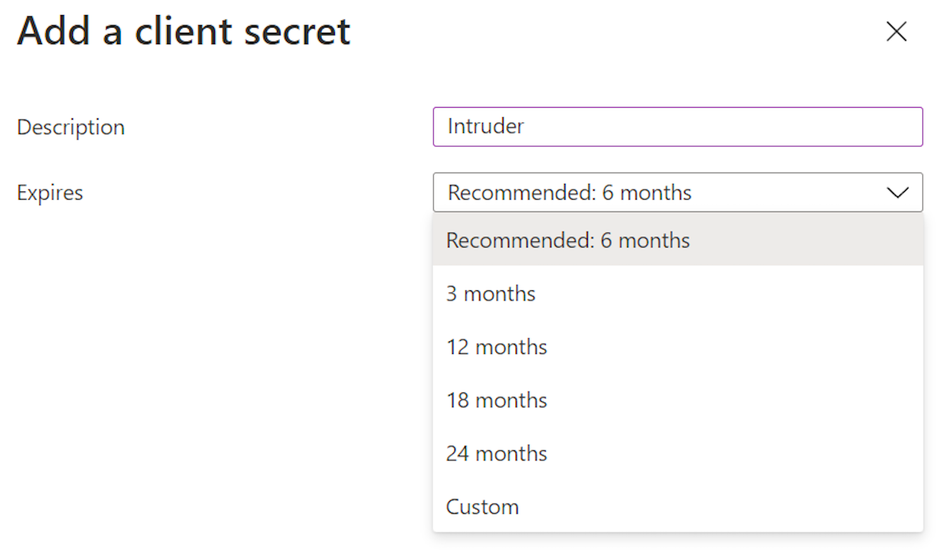
- Now click Add and note down the secret ‘ VALUE ‘. ( Not the Secret ID).
(This is the Application secret key .)
Important: Please note that you won’t be able to see that Application secret key again after you’ve left this screen, so make sure you copy and paste it now!
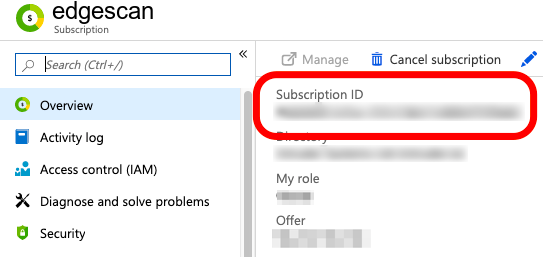
- Subscription ID
- Search for ‘Subscriptions’ using the search functionality and click to see the ‘Subscriptions’ menu.
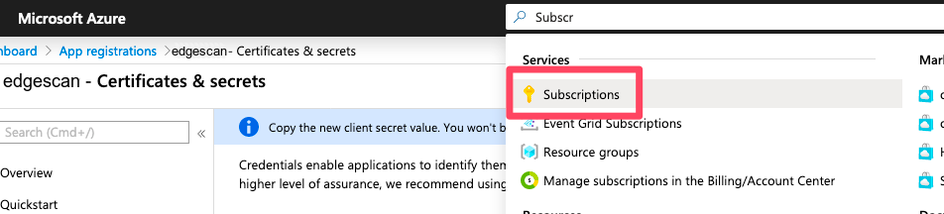
- Take note of your Azure Subscription ID:
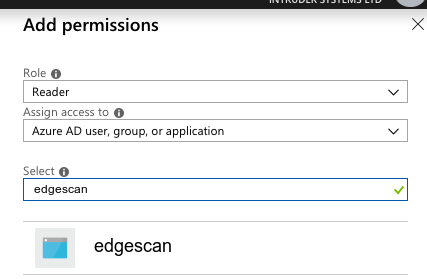
3. Create a role
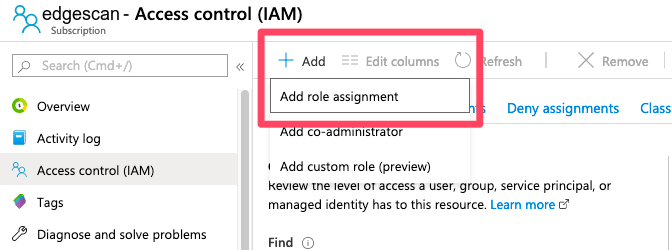
- Select Access control (IAM) from the left menu inside the subscription detail page.
- Click Add.
- Then click Add role assignment .
- A new menu will appear on the right of the screen. Type Reader into the search box.
- Click on the Reader item in the drop-down. (We require read-only access in order to fetch your public IP addresses and DNS hostnames.)

- Assign access to: Ensure Azure AD user, group, or application is selected.
- Select: Search for the application we created earlier (e.g. ‘edgescan’ or whatever you chose to name it). Select that application, and click Save.
4. Take note of the Application ID, Application secret key, Directory ID and Subscription ID and provide them to edgescan.